Hell-Oh!!
¿Qué
toca hoy? Un cosplay! ¿De qué? De qué va a ser, siendo yo la loca
de Iori Minase xD De verdad, es que no sé ni por qué hay duda… xD
Hell-Oh!!
What are we talking today about?? A cosplay! A cosplay of what?? But
of course, me being the crazy Minase Iori fan, what could it be
about?? xD The doubt offends
me xD
No
sé ni cuántos veranos llevo queriendo hacer este cosplay,
pero
todas las veces, cuando me daba cuenta, ya era mitad de agosto y no
daba tiempo a coserlo ya. Así que esta vez empecé en junio, aunque
me parecía muy temprano, pero nada me iba a detener esta vez. Así
que, POR FIN xD Me encanta este traje ♥♥♥
I
don’t remember how many summers ago I’ve been wanting to do this
cosplay, but all the times I forgot until it was too late to start
sewing it and have it finished on time. So, this time I started in
June. It was too early, but nothing was going to stop me this time!
So, FINALLY, HERE IT IS!! I love this outfit ♥♥
Este
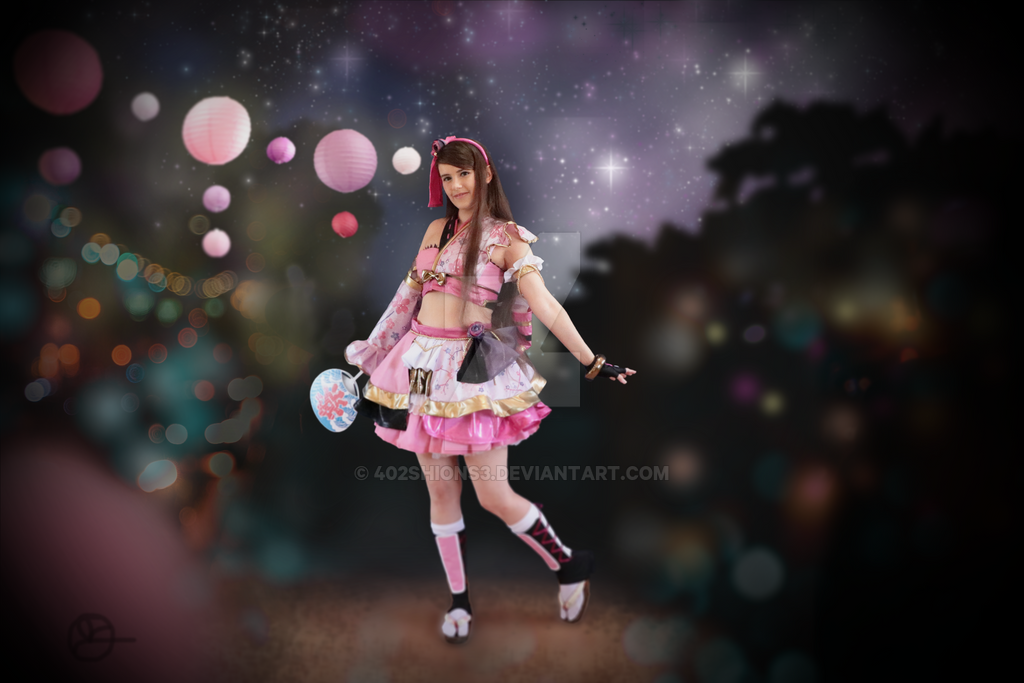
cosplay se llama Tsukiyomi's Dancing Flower Kimono (月読華舞和装),
pero lo llamo Amaterasu, porque ese es el nombre de la canción que
iba a bailar, y es más corto de decir xD Pega mucho para las fechas
por el tema de los dioses, el tanabata y los matsuris (de lo que va
el baile, a parte de amor xD), así que tenía que ser para ahora sí
o sí.
En
el próximo párrafo me voy a quejar, pero quiero reiterar que este
vestido sí me gusta muchísisisisismo ♥♥♥ Es de los pocos que
valen la pena actualmente ♥
This
outfit’s name is Tsukiyomi's Dancing Flower Kimono (月読華舞和装),
but I name it Amaterasu (after the song’s name) because it’s
shorter xD Because of the gods, tanabata and matsuri, this dress (and
song) was for summer.
In
the next paragraph I’m going to complain, but I want to reaffirm
that I DO love this dress so much ♥♥♥ It’s one of the few
that are good, now.
Bueno,
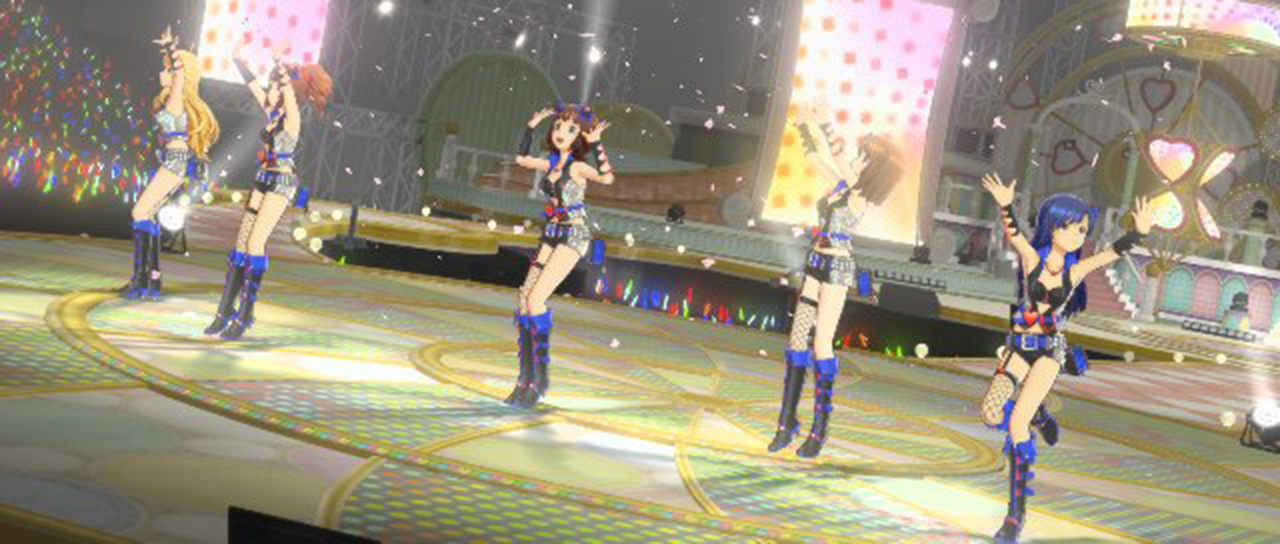
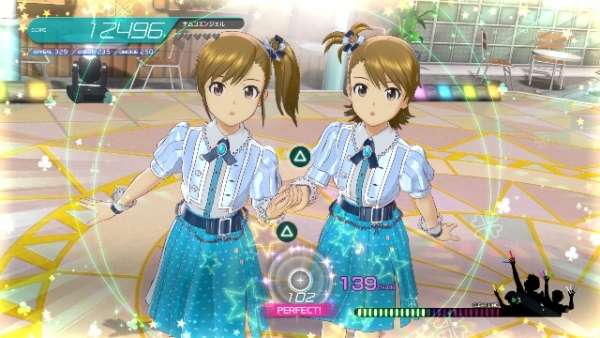
este traje apareció por primera vez en Platinum Stars y en ese
juego, cambiaron un poco el cómo habían distribuido los trajes
hasta la fecha. Antes tenían Cute/Floral (adorable, cómodo),
Cool/Luxury (telas brillantes, corte más cool y/o sexy),
Cosmic/Starry (leds, fantasía, materiales raros, etc) y Extend
(variado). Los 3 primeros tipos eran trajes diferentes entre sí para
cada chica, pero basados en un mismo concepto, y había muchas
coloraciones diferentes. Y en el último, había conjuntos
aleatorios. Unos eran todos iguales, otros todos iguales pero cada
una de un color, otros tenían 2-3 modelos diferentes y los repartían
entre las chicas y algún caso puntual de modelos diferentes en un
mismo concepto.
Pero
a partir de este juego, la cosa cambió. Ahora las categorías son
Cute, Cool, Cosmic y Clever. Las 4 tienen un conjunto que diríamos
es como en los anteriores, porque tiene muchas coloraciones, PERO
esta vez es modelo es el mismo para todas. Y esto no me parece bien
para nada. Porque venden los DLC de recolor (wau, que currada,
meterle un cambio de color a un diseño 3D ya hecho - sarcasmo)
y antes al menos se curraban 12-13 vestidos, ahora sólo hacen UNO. Y
los diseños tampoco son para tanto, para ser los traje insignia :/ Y
otra cosa que no me gusta, es que el resto de trajes están mezclados
aquí y allá en las 4 categorías. De acuerdo, puedo entender que
cada traje tenga su característica, pero a la hora de ordenarlos, es
pésimo. Bueno, eso y que pocos trajes de los de ahora tienen buena
pinta. Debieron querer innovar, pero justo lo más me gustaba de sus
diseños es que eran sencillos y limpios. Hay muchos diseños
actuales los cagan añadiéndoles chaquetitas o gorritos cutres, o un
calzado que no pega para nada con el vestido… Para
hacer complejo un traje, hay que saberlo hacer, no pegarle cosas
encima sin más. A veces hay que saber cuándo parar, también.
En
fin, paro ya, que me enfado xD
Well,
so this dress first appeared in Platinum Stars. In that game, the
outfit organization changed. Before, they had Cute/Floral (cute,
comfy, pastels), Cool/Luxury (cool-sexy, shiny fabrics),
Cosmic/Starry (weird materials, leds and fantasy designs) and Extend
(random). The three first categories had an outfit set. Each dress
different for each girl, but all of them based on the same concept
and keeping some coherence between all of them. And there were lots
of recolours. And, in the last category, the outfits were different.
Some of them were just 1 outfit for all, others were the same outfits
but the colours were different between the girls, others were 2-3
different outfits distributed between the girls, and there were
certain (rare) outfits that were different for all the girls (but no
recolours).
But,
at this game, all of this changed. Now, the categories are: Cute,
Cool, Cosmic and Clever. All 4 have a set like in the past games, but
the design is the same for all the girls. And I’m not happy with
this. They sell all those DLC with recolours of just 1 dress. Before,
there were 12-13 dresses in one. (Not that it was a huge work anyway,
all being 3D models). And I don’t find those dresses very appealing
:/ And it’s sad, because they’re supposed to be the insignia
outfits. And other thing I didn’t like is that the rest of outfits
are mixed here and there between these 4 categories. I mean, I
understand each outfit can have different features, but, in terms of
organisation, it’s very messy and confuse. And few of the dresses
look good. Maybe, they wanted an evolution, but I really liked the
clean and simple designs. They wanted complex designs, with lots of
accessories, layers and thingys, but, you know? You have to do it
right. You can’t just put together things in hopes it works or
adding unnecessary accessories or whatever. Sometimes you need to
know when to stop. Because there are good designs, but they no longer
look good because of the unneccesary additions.
Hm.
I’ll stop now. I’m getting angry x_D
 |
| Random |
 |
| Cute |
 |
| Cool |
| Cosmic |
 |
| Clever |
Y,
nada, al grano pues. (Daos por disclaimeados, tod@s, por cualquier
cosa que os pueda ofender, gracias)
He
usado: telas (5 rosas, 3 negras, 2 blancas, 2 doradas, 2 moradas,
entretela), accesorios (hilos, cremalleras, botones, cintas,
cordones, aros, diadema, pulsera, gomas, cascabel, abalorios,
ganchos, etc), sandalias y calcetines japoneses, petti, mi pelo, un
guante negro, pintura de tela.
Anyway,
let’s talk about the actual cosplay! (Now, get your own personal
disclaimer for anything you want to get offended by, thanks)
I
used: fabrics (5 pink, 3 black, 2 white, 2 golden, 2 purple,
interlining), accessories (threads, zippers, buttons, ribbons, cord,
hoops, diadem, bracelet, elastic band, jingle bell, beads, bobby
pins, etc), japanese sandals and socks, petti, my hair, a black
glove, fabric paint.
Por
lo general, mi proceso con los cosplays suele ser el siguiente: hacer
los accesorios 1º, luego cortar la mayoría de la tela de casi todas
las piezas e ir haciéndolo todo a la vez. Digo suele, porque a veces
si alguna pieza se me atraganta la dejo para después, o si no quiero
hacer los accesorios aún, porque puedo hacerlos con retales de
cortar las piezas grandes. Pero en esta ocasión, he ido casi pieza a
pieza, al menos al principio, y la pintura ha ido al final. Así que
esta vez seguiré el orden que seguí al hacer las piezas xD
By
the way, when doing a cosplay, I usually start by the accessories,
then I cut the fabric I’ll need for almost all the cosplay and I do
it all at once. Sometimes I leave some pieces undone until I cut
huger pieces so I can use the fabric scraps better. But, this time, I
made almost all the cosplay piece by piece, at least on the huger
pieces. And the painting was the last thing I did. So, this time I’ll
follow this order xD
❀FALDA❀
Utilicé
una tela rosa básica para la base, y para el fruncido del borde, una
capa de esa misma tela y otra de seda falsa. (Desde que utilicé este
truco en el Halloween Trickster me he aficionado a superponer capas
con diferentes transparencias para generar colores más ricos y
mantener mejor el equilibrio cromático) Después, puse dos vueltas
de puntilla blanca que me sobró del cosplay de Reimu. Luego, fruncí
un poco de tela dorada y otra blanca y las puse por arriba, para
crear las capas. Las primeras líneas de puntilla, sí las puse
enteras, porque podía llegar a verse al bailar, pero estas últimas
dos no las hice completas, porque total, no se ven, ni dan tanto
volumen como para que valga la pena el gasto de tiempo y material (ya
me di cuenta de esto con el Prima Concerto).
Después,
y visto el tipo de brillo del material en los vídeos, elegí en
fucsia y negro del mismo tipo de tela brillante, los fruncí y
coloqué, con crinolina en el borde.
Y
para la última de las capas, hace tiempo conseguí en rebajas una
tela perfecta para la zona de estampado (sin estampado). Me
interesaba mucho utilizar el mismo tipo de tela en cada lado de la
falda, para lograr el mismo volumen en los dos lados, así que, para
el lado más oscuro, le di una 2ª capa con la misma tela rosa de
seda falsa, con el borde de un dorado de textura similar a la tela
base de esa capa, también con crinolina. Esta vez el patrón fue de
círculo.
Para
la cinturilla, utilicé otro tipo de tela rosa fucsia, porque la capa
fucsia era elástica, y no hubiera tenido suficiente fuerza. Puse la
cremallera en la última de las capas, las demás quedaron abiertas
para poder ponerme la falda, porque total, es que ni se ve, con tanta
capa y tanto vuelo.
Después,
hice medio lazo de tela morada transparente (debería ser rosa, pero
se quedaba demasiado transparente/blanca al lado de los demás rosas,
así que me decidí por esta), junto con un pedazo de tela negra como
la de una de las capas, y lo cosí a la cinturilla. Luego le puse el
cordón dorado en la capa blanca y otra alrededor de la cinturilla,
con un botón de cierre. La flor y el estampado los pinté, y para
terminar bonita la unión entre la flor y el lazo, cosí abalorios
rosas y morados.
❀SKIRT❀
I
used a basic pink fabric for the skirt’s base. For the pleated
part, I used one layer of this fabric with a pink fake silk one.
(Since I used this technique on the Halloween Trickster, I’ve done
it many times. I really like the depth of the colour and keeping a
chromatic coherence). Then I put 2 layers of white lace (leftovers
from Reimu) all over the skirt, because this could be seen while
dancing, but the next layers (gathered golden and white) I only put
them at the center front part. It doesn’t add volume and can’t be
seen. I learned about this in Prima Concerto’s skirt. It’s no
need to waste time and material.
After
that, for the next layer, I picked in black and fuchsia the same
shiny fabric, and I gathered it. I put horsehair braid on the edges.
And,
for the last layer, I used a fabric that I got some time ago, and
it’s perfect for it. It has a pearl shine to it, that looks
perfect. I just needed to paint the flowers. And I put golden fabric
on the edge, with horsehair braid, again. I used a different golden
fabric from the one I gathered, because the one I gathered I wanted
it to be extra shiny and thin, but this one I wanted it to have a
similar consistency to the pink one I was using at that layer
(similar to leatherette), so it would be coherent. For the same
reason, I wanted to use the same pink fabric on both sides. I wanted
both sides to have the same volume, but the colours where different.
So, I put a layer of the pink fake silk over it. Btw, this time, I
used a round pattern.
For
the waistband I used a thicker fuchsia fabric, so it could keep the
shape and all the layers in place. The other fuchsia fabric is
elastic, it wasn’t good for this. I put the zipper on the last of
the layers, to close the skirt. The other layers are open. With all
those layers and fabric, it can’t be seen, anyway.
Then,
I made a half purple ribbon with transparent fabric (it should be
pink, but the pink fabric was almost white by the side of the other
pink fabrics, so, I picked this one), and a piece of the shiny black
fabric, and I sewed it to the waistband. After that, I put golden
cord on the first layer white gathered fabric, and around all the
skirt, with a button to open/close it. The flower was white, so, I
painted it, and I put some purple and pink beads on the “ribbon”
and the flower joint, to make it look better.
❀TOP❀
Primero
hice el top-sujetador, con una capa de la tela rosa de seda falsa y
dos de la que utilicé para la base de la falda. Para darle
consistencia y evitar posibles transparencias. Para el borde utilicé
una tela morada algo tiesa que tengo, ya que si es muy blandita, se
dobla y no se ve -_- Hice la pieza entera para mantener consistencia
en la pieza y porque asoma por varias partes.
Sobre
esto, va la pieza de “kimono” (es de lo que se supone que
deriva), que hice basándome en patrón de kimono, pero con pinzas, y
adaptando la forma. Lo hice con la tela rosa para el estampado de
flores. Fue bastante complicado conseguir que no salieran arrugas,
porque en realidad no es el mejor tipo de tela para esta pieza
(aunque podría ser peor), pero debía ser la misma en todas las
piezas del estampado, así que… Además, para lograr mantener la
estructura bien, tenía que utilizar telas similares a esta rosa, por
lo que usé el fucsia de la cinturilla, una tela negra similar a la
polipiel y el dorado de los bordes. La excepción fue la tela dorada
del lacito, que se supone que emula a un obiage (la cinturilla del
top emula a un obi) así que preferí usar la otra tela dorada, que
es más blandita y más como un pañuelito. Para la “cinturilla”
debí haber estirado más la pieza negra y dorada, pero la lié un
poco y me dolían demasiado los dedos como para quererme pelear más
con la tela, y lo dejé estar así ^^U Para podérmelo poner, puse
una cremallera en el lado sin hombro y un par de botones entre los
Haneri-Tomoeri (la parte del cuello). Para la cinta rosa del Tomoeri,
al ser una tela que no se deshilacha, simplemente hice cortecitos y
pasé una tira de tela fucsia. Y el volantito del hombro es de patrón
circular. Me hubiera gustado ponerle algo parecido a la crinolina
para que se quedase más estirado, pero esta no quedaba bien. Y,
bueno, lo último pinté las flores.
❀TOP❀
First,
I made the top-bra-cover, with 2 layers of basic pink fabric and 1 of
fake silk. For consistency and avoid transparencies. For the pointy
edges I used a thick purple fabric I have. For that part, if the
material is too soft, it wrinkles and hides -_- I made the whole
piece, not only the parts that are shown, just to make the rest of
the piece more stable.
Over
this, it goes the “kimono”part (that’s what it’s supposed to
be). I made it based on a kimono pattern, but adapting the shape. I
made it with the pink fabric I used for all the flower parts. It was
a bit complicated to get this piece without wrinkles, because this is
not the best fabric for a piece like this (it could be worse, tbh).
But it had to be that fabric. And, anyway, I finaly got it without
wrinkles. Also, I had to use other fabrics with similar thickness to
this one, on this piece, to mantain the coherence on the garment. So,
I used the thick fuchsia, a thick black fabric (similar to
leatherette) and the thick golden, for the top’s waistband
(emulating an “obi”) and the neck “Haneri-Tomoeri” parts. The
exception is the golden fabric of the little ribbon, because that
part is supposed to be an “obiage”, which is more like a thin
scarf, so, I used the thin golden fabric.
I
put a zipper on a side and some buttons on the Haneri-Tomoeri parts.
The “obi” I know I avoided making the black-golden parts bigger,
but my fingers were hurting a lot and I had enough by that time (I
found the thimble later).
The
shoulder ruffles, I made it with a round pattern. I’d like it to be
more up, but the horsehair braid looked weird there, so I didn’t
put it in the end. And, well, I finally painted it.
❀DIADEMA❀
Para
la diadema, forré una diadema de metal básica con tela fucsia como
la de la falda, porque era elástica, y le puse un poco de relleno de
peluche para que quedase más redondita. Para la parte blanca del
lazo, le puse entretela para que tuviera más volumen y a la parte
fucsia del lazo le puse crinolina. La tira fucsia colgante sé que
tiene un estampado, pero como no se ve bien he preferido dejarlo
estar, de todos modos esta tela ya tiene brillo, así que sobra.
Luego le puse el cascabel y la flor pintada. Igual que en el lazo de
la falda, le cosí unos abalorios bonitos para sellar más bonito la
unión de la flor con el lazo.
❀HAIR
ACCESSORY❀
For
the hair accessory, I covered a simple diadem with shiny fuchsia
fabric. I filled it with plush filling for a roundy shape. For the
white part of the ribbon, I put some interlining to the white fabric,
to give it some volume. For the volume of the shiny fuchsia part of
the ribbon, I used horsehair braid. For the fuchsia part that’s
hanging, it’s supposed to have a drawing on it, but I couldn’t
see it well, and because I wasn’t sure of it, I decided to leave it
unpainted. Anyway, it’s shiny enough. Finally, I added the jingle
bell and the painted flower. I also put there some pink and purple
beads.
❀GUANTE❀
El
guante lo compré. Como ya expliqué anteriormente, la máquina de
coser que uso es viejita y no tiene muchas funcionalidades de las más
actuales y no regula bien la tensión del hilo ya, y no tiene piezas
desmontables para poder manejar prendas pequeñas. Así que, por si
no fuera dolor coser guantes, es todavía más complicado en estas
condiciones. Así que sencillamente compré un par de guantes, que
además son baratos. Le corté los dedos y le cosí las piezas rosa y
blanca. Y ya.
❀GLOVE❀
I
bought the glove. As I already explained, the sewing machine I use is
very old. There are some functions it doesn’t have, and some others
don’t work nice anymore. It’s not good to manipulate small
pieces. So, knowing that sewing gloves is not easy, this makes it
even more frustrating. So, I just bought them, I cut the fingers and
sewed the pink and white parts on it. And that’s it.
❀ACCESORIOS❀
Para
la pulsera utilicé una pulsera de madera, le puse un poco de relleno
de peluche y forré con la tela dorada fina por encima.
Para
el brazalete, cosí una tira de tela blanca fruncida a una tira de
tela dorada de la otra, con una goma dentro para que no se me
resbale, y le cosí cordón dorado.
❀ACCESSORIES❀
For
the bracelet, I used a wooden bracelet. I put some plush filling and
I covered it with the thin golden fabric.
For
the wristband, I sewed a gathered piece of white fabric on a piece of
thick golden fabric, and I put an elastic band so it doesn’t slip.
I also sewed golden cord on it.
❀LAZO❀
El
lazo de la espalda lo hice con la tela fucsia de la cinturilla porque
a) Se supone que sale del obi y b) esta tela es más consistente. Las
tiras negras son de la tela negra brillante, y la dorada es la tela
plástica. Para la pieza blanca, usé la misma tela blanca del resto,
pero con entretela, para que se quedase firme y ayudase a dar volumen
al resto del lazo. Le puse una tira del morado transparente, cordón
dorado y una pieza del dorado fino. Es de quita y pon con un botón,
en la cinturilla. Cabe destacar que rompí 2 agujas tratando de
atravesar el centro del lazo para darle la forma…
❀RIBBON❀
The
ribbon for the back, I made it with the thick fuchsia fabric, the
same from the top’s waistband, because a) It’s supposed to come
out from the “obi” and b) this fabric’s thicker and works
better for this item. I made the strips of the black shiny fabric and
the thick gold. The white piece is from the same white fabric from
the rest, but I put interlining to make it thicker. It helped all the
ribbon to stay in shape ♥ I put a layer of transparent purple
fabric, golden cord and a piece of thin golden fabric. I put a
button, so it’s detachable from the top.
*I
broke 2 needles trying to go through the ribbon...
❀MANGA❀
Utilicé
la tela dorada plástica, un pedazo de tela morada transparente y la
tela rosa para el estampado. Fue un poco complicado colocar el
entramado (que sólo fijé en los dos bordes, para dar mayor
flexibilidad a la pieza) porque la tela morada es muy resbalosa y
deformable. En la pieza dorada superior coloqué goma para que no se
me resbalase la manga. Reconozco que hice esta pieza demasiado
grande, pero no sé, me sentía un poco extra, yo xD Y lo pinté y
tal.
❀SLEEVE❀
I
used the pink fabric (the same I used for all the parts I needed to
paint), a piece of transparent purple fabric and the thick golden
fabric. It was hard to place the gold grid over the transparent
fabric, because this fabric is slippery and deformable. Inside the
upper golden part, I put some elastic band, so the sleeve wouldn’t
slip. I admit I made the sleeve a bit huge, but, I don’t know, I
felt extra XD The last thing I did is paint it.
❀PINTURA❀
Sí,
le hago apartado propio, porque no quería enredarme en cada pieza o
repetir cosas.
Las
flores eran blancas. Era un poco raro porque son muy pequeñas y no
encontré referencias claras o muy de cerca. Así que sabía que
tenían morado, rosa y blanco por capas. Las blancas decidí hacerlas
con degradado para que no quedase raro al lado de los otros pétalos.
Con
el estampado de las piezas me pasó algo parecido. No hay buenas
imágenes del diseño, así que sencillamente coloqué a modo puzzle
lo que logré ver y rellené un poco de mi cosecha. Se intuían
ramitas y flores a puntitos, así que eso hice. Además, las flores
reflectan, al igual que la tela, así que aparecían y desaparecían.
Y la espalda… Bueno, ya os hacéis una idea. La cuestión es que a
la mezcla le añadí pintura nacarada (y al final repasé las flores
con una capa de nacarado) para que tuviera el mismo brillo que la
tela.
❀FABRIC
PAINT❀
Yes,
this has its own section, because I didn’t want to repeat the same
explanation on each piece.
The
flowers were white. It’s a bit weird, because they’re small, and
the references weren’t close enough to the flowers, or it wasn’t
high quality. I knew it had purple, white and pink layers, but I kind
of made it up. I also made the white layers a bit coloured, so the
colour difference wouldn’t be weird to the eye.
For
the flower pattern I had the same problem. The references weren’t
clear, they were far and there were some blind spots. Also, that
fabric is shiny (so the flowers are), so, depending on the light
position, the flowers kind of appeared and disappeared somehow. I was
only able to see huge flowers and also some kind of twigs and points
(flowers?). I put all this and worked from that. And, because the
flowers look shiny, I added pearl paint to the colours I used. I also
covered it on top with more pearl paint.
❀CALZADO❀
Para
el calzado utilicé unos zuecos japoneses, que obviamente no tienen
tanto tacón como el original, pero me da igual; era el tacón o
utilizar un calzado que no tiene nada que ver.
También
utilicé unos calcetines de dedo japoneses. Tuve que hacer como una
pernera blanca también, así que podía haber hecho el calcetín, de
paso, pero me dije que sería menos resbaloso unos con tela de
verdad, y más si quería usarlo para bailar.
La
pernera blanca es de tela elástica, pero por muy elástico que sea,
tiene un límite, y por el tobillo no pasaba, así que le hice un
corte por delante (está tapado por la pieza negra) y para cerrarlo y
y que no se suba para arriba al caminar, le hice 4 agujeritos y le
pasé una cinta, pasando por debajo de mi pie. Parece rústico, pero
es sencillo y funciona maravillosamente.
La
pieza negra la hice con tela elástica negra. Utilicé para afuera el
lado que menos brillaba xD Cierra con velcro por el talón, va cosido
fijo bajo el zueco y tiene una tira de tela antideslizante bajo el
tacón, para que no se levante el forro en el tacón. Pero sólo una
tira para poder seguir abriendo la pieza para ponérmela.
Cosí
sobre la pieza negra la “espinillera” rosa, que es de la tela
rosa básica de la falda, con una capa de la tela rosa de falsa seda
y entretela para darle rigidez y mantenga la pieza en el sitio sin
resbalarse, con bies blanco en el borde.
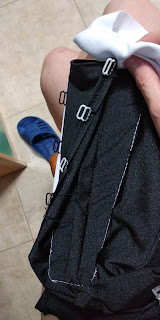
Para
asegurarme de que no se movía nada, le di 3 puntadas para unir la
pieza negra con la blanca, y para pasar las cintas, les cosí unos
aros de sujetador. Los tenía mucho tiempo dando vueltas guardados,
iban en un pack de cierres y cremalleras que antes compraba bastante,
y oye, me han servido para algo al final :3
❀SHOES❀
For
the shoes, I used some japanese sandals. They obviously don’t have
the same heels, but I prefered to be more accurate to that part than
the heels part.
I
also used japanese socks. I also had to sew a white thingy for the
leg, so I could’ve just sewed the sock, too. But I think using the
actual socks is less slippery (even more for dancing).
I
made with elastic fabric the white thingy for the leg. It was
elastic, but didn’t go well through the ankle, so, I cut it in the
front (it’s hidden by the black part) and I tied it to the ankle
with some ribbon and through some holes. It’s a bit rustic, but it
works perfect xD
The
black part, I made it with elastic fabric. I put the shiniest part on
the inside xD It opens on the ankle with velcro, it’s sewed under
the sandal and a strip of non-slip fabric under the heel. I needed
that strip so the fabric on the heel wouldn’t slip, but I couldn’t
put the whole part, because I needed space to be able to put the
sandal through it.
Over
the black piece, I sewed the pink shin guard. I made it with
interlining, pink basic fabric and pink fake silk, and white bias on
the edges. I wanted it to be thick, so the pieces wouldn’t slip,
that’s why I put the interlining here.
I
attached the black piece to the white part on 3 points, just to be
sure it wouldn’t move around. And, for the ribbons, I sewed some
hoops. I had some hoops from a sewing pack I used to buy; not because
of the hoops, as you can imagine by the quantity I had. But their
time to shine arrived! That’s why I don’t throw anything xDDD
❀PETTI❀
Bueno,
no hace falta para el volumen de la falda, porque con todas las capas
y la crinolina ya le da la forma, pero lo uso para que los pliegues
de la falda base se vean, que si no se hundían mucho.
❀PETTI❀
Well,
I don’t think this is completely necessary… Because all the
layers are enough to give all the volume, but I think it’s good for
the bottom of the first layer.
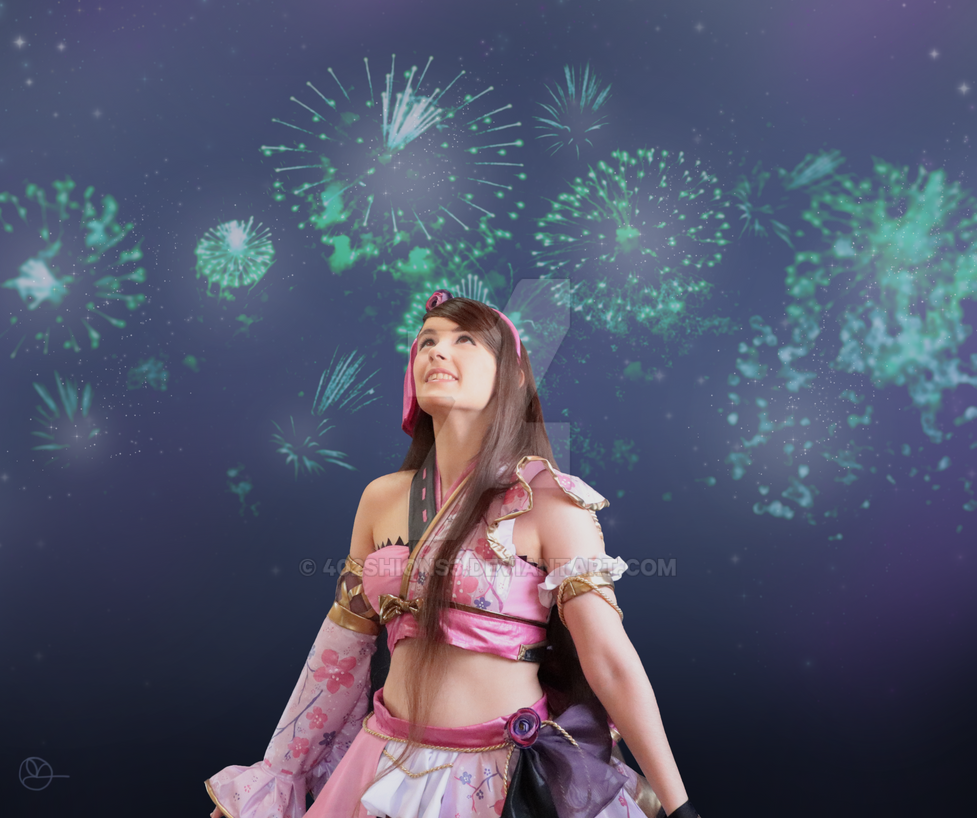
Y,
bueno, como ya sabréis(?), bailé Amaterasu con este cosplay, os
dejo el vídeo aquí debajo, junto al cosplay closet (que os lo recomiendo, porque fui muy genia y olvidé sacar fotos decentes a las piezas terminadas desde diferentes ángulos, y ahí podréis verlo mejor) y algunas fotos.
Espero que os guste!! Gracias por leer!! Hasta la próxima!!
And,
as you already know(?), I danced Amaterasu with this cosplay. Here’s
the video, as well as the Cosplay Closet (which I recommend watching, because I was so genius I forgot taking good photos of the finished pieces. There you'll watch them better) and some photos. I hope
you like it!! Thanks for reading!! See ya~!
.





No hay comentarios:
Publicar un comentario